
Mid Dermal Tightening Results That Show Up Fast, With No Surgery, No Downtime, and No Waiting
Loose, crepey skin on the face or body can stubbornly resist creams and surface-level treatments. Mid dermal tightening addresses this by delivering controlled thermal energy to the deeper dermal layer, stimulating immediate collagen contraction and triggering a longer-term remodeling response. This precise, non-surgical approach firms sagging tissue, smooths fine lines, and restores a lifted contour without downtime. Visible improvement typically develops gradually over several weeks as new collagen strengthens the treated area, with optimal results achieved through a short series of sessions.
What Exactly Happens Beneath the Skin During a Mid-Dermal Session?
During a mid-dermal tightening session, the applicator delivers focused thermal energy into the reticular dermis, the skin’s structural scaffolding layer. This heats collagen fibers to roughly 60–65°C, causing immediate denaturation—the triple-helix structure unwinds and shrinks, creating an instant tightening effect. Simultaneously, the heat triggers a wound-healing cascade: fibroblasts flood the area and deposit fresh collagen, while myofibroblasts contract the surrounding tissue. Over the following weeks, this neocollagenesis and elastin remodeling visibly firm the skin. The result is a dual-phase lift—immediate contraction plus progressive reorganization. Q: Why does it feel like a deep heat? A: Because the energy bypasses the epidermis and targets water molecules in the mid-dermal layer, generating friction that stimulates repair without surface damage. By session’s end, microedema and localized inflammation signal the start of your skin’s rebuilding process.
The Biological Trigger: How Heat Remodels Collagen at the Mid-Layer
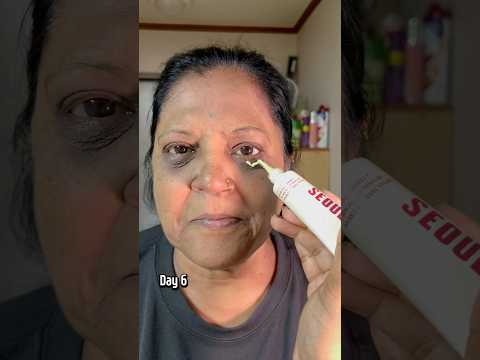
When controlled heat hits the mid-layer, it acts as a precise biological trigger, not a burn. The collagen fibers, which normally sit in a stable, crimped state, unwrap slightly as temperatures rise to a therapeutic range. This denaturation is the signal your body needs to kickstart repair. Fibroblasts—the cells that build new collagen—sense this change and immediately ramp up production. The result is a double action: old, lax collagen contracts for instant firmness, while fresh collagen deposits fill in the gap over the following weeks. For the best outcome, the heating must reach that exact depth, otherwise the trigger simply doesn’t fire.
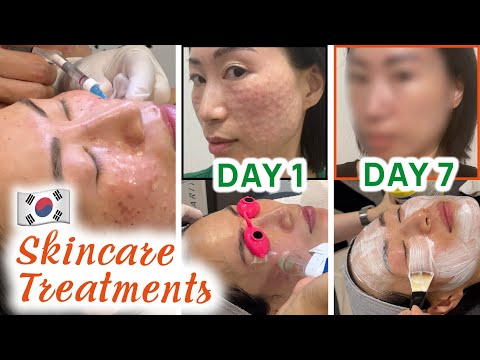
Why the Mid-Dermis, Not the Surface, Is the Real Target for Lifting
The surface only reflects what the architecture beneath it dictates. For genuine lifting, the mid-dermis is the true structural battlefield, because this layer holds the collagen and elastin network that literally tugs the skin upward. Superficial treatments polish texture; they cannot counteract gravitational sagging. When heat or energy reaches the mid-dermis, existing fibers contract immediately, creating an instant tightening effect. Then, the wound-healing cascade rebuilds thicker, more organized collagen, which anchors the skin to deeper tissues with renewed tension. The visible result is not skin being pulled, but skin being taught to hold itself again. The sequence of a mid-dermal session works accordingly:
- Energy penetrates past the epidermis, bypassing surface resistance.
- The mid-dermal temperature spikes, denaturing collagen fibers while preserving surrounding cells.
- Fibroblasts activate, depositing new collagen along lines of mechanical stress.
- Over weeks, the scaffold contracts vertically, producing the lift.

How to Prepare Your Skin for Maximum Results From Deeper Tissue Stimulation
To maximize mid dermal tightening from deeper tissue stimulation, begin by hydrating internally for 48 hours prior—well-hydrated skin conducts thermal energy more uniformly, allowing the collagen remodeling response to reach deeper layers without resistance. Avoid retinoids, AHAs, and physical exfoliants for Sofwave in seoul three days; a compromised barrier increases inflammation and disperses the focused energy, dulling results. On treatment day, cleanse thoroughly but skip toners, serums, or moisturizers—residue creates a barrier that blocks penetration. For optimal conductivity, ensure skin is completely dry and free of oils. Schedule your session 7–10 days post-microneedling or light peel, so the dermis is primed with active fibroblasts ready to amplify the tightening cascade. Finally, skip caffeine and alcohol 24 hours before; vasoconstriction reduces blood flow, starving the target tissue of the oxygen and nutrients needed to accelerate collagen synthesis.

Skincare Adjustments in the Weeks Before Your Appointment
In the three to four weeks before your mid dermal tightening session, your skincare routine should shift toward barrier-supporting preparation. Stop using retinol, AHAs, or BHAs at least ten days out—they thin the stratum corneum and increase reactivity during deeper tissue stimulation. Instead, switch to a gentle cleanser and a ceramide-rich moisturizer morning and night to stabilize hydration. Add a mild vitamin C serum only if you have used it consistently for months; do not introduce new actives now. Two days prior, perform a very light enzyme exfoliation—never physical scrubs—to smooth surface texture without inflaming deeper layers. On the day of your appointment, cleanse with water only and apply nothing else.
- Discontinue retinol and acids 10–14 days before, not just a few days prior.
- Focus on ceramide and panthenol formulas to fortify the skin barrier daily.
- Skip all facials, masks, or peels for two weeks before your session.
- Hydrate internally with water, but avoid alcohol and caffeine for 24 hours prior.
Hydration and Supplements: The Internal Prep Most People Skip
Hydration and supplements form the internal prep most people skip, yet they dictate how efficiently deeper tissue stimulation rebuilds the mid-dermal matrix. Water intake directly influences fibroblast activity; even mild dehydration reduces the extracellular fluid volume needed for collagen synthesis and enzyme transport post-treatment. Strategic collagen cofactors—specifically vitamin C, zinc, and copper—must be present in the bloodstream before the session, not after, because the thermal shock from mid dermal tightening triggers an immediate metabolic demand that cannot be met retroactively. The window for nutrient availability closes within hours of the procedure, making pre-loading more critical than recovery-phase dosing. Avoid high-dose vitamin E or omega-3s for 48 hours prior, as their anti-platelet effects can prolong the inflammatory response that should remain controlled.
- Start 1.5 liters of extra water daily, three days before the session, to normalize tissue turgor.
- Take 500 mg vitamin C with 15 mg zinc and 2 mg copper, 24 hours and 2 hours pre-treatment.
- Skip fat-soluble antioxidants (vitamin E, high-dose fish oil) for two days prior to avoid excessive bleeding risk.
- Consume a moderate protein meal two hours before—amino acids are the raw substrate for immediate collagen cross-linking.
Managing Discomfort: What You’ll Feel and How to Make It Far More Tolerable
During mid dermal tightening, you’ll feel a distinct, pulsating heat paired with a prickling sensation as the energy penetrates deeper tissue layers—not sharp pain, but a persistent, building warmth. The most intense moments occur when the applicator passes over thinner skin, like the temples or jawline, where the sensation concentrates. To make this far more tolerable, time your sessions away from your menstrual cycle, as hormonal sensitivity amplifies nerve response. Ask your practitioner to lower energy output by 10–15% for the first pass, then increase after your skin acclimates. Numbing cream applied 40 minutes prior dulls surface sting, but internal heat remains—so use a handheld fan on the treated area and breathe slowly in, fast out.
Hydration is your best ally: well-hydrated skin conducts heat evenly, reducing sharp hotspots that cause flinching.
Communicate every spike verbally; a 20-second pause between passes lets the dermis cool before rechallenge.
Topical Numbing vs. Cooling Devices: Which Works Better for This Depth?
For mid dermal tightening, cooling devices outperform topical numbing because the treatment heat builds below the numbed surface. Topical creams dull the skin’s outer layer but cannot block the deeper thermal sensation that triggers flinching mid-procedure. Cooling, applied continuously to the epidermis, counteracts that rising heat at the exact depth where discomfort peaks, keeping your skin’s surface temperature down while the dermis works. A practical sequence: ask for pre-cooling for two minutes, then have the provider sync the cooling burst with each pulse, and finally use a second cool pass immediately after. This layered approach reduces sharpness far better than waiting for a cream to kick in—which often leaves you feeling the real sting anyway.
Adjusting Energy Levels Safely Without Sacrificing Firmness Gains
To adjust energy safely during mid dermal tightening, always step down in 10–15% increments rather than making large jumps, preserving the firmness gains you’ve already built. Higher settings don’t guarantee better lifting—they risk overheating the dermis and triggering rebound laxity. Instead, watch for immediate tissue blanching or a sharp stinging sensation, then reduce power by one level and extend your pulse duration to maintain cumulative heat. This keeps collagen contraction steady without edema. Thermal stacking at moderate energies—short pauses between passes—allows deeper penetration while protecting the epidermis.
Q: Can I raise energy after three sessions without losing firmness?
A: Yes, but only if you’ve seen clear improvement and no pain spikes. Increase by 5–8% and monitor for 48 hours; if swelling or tenderness rises, drop back to your previous setting—your firmness remains because the collagen matrix has already remodeled.
Your Week-by-Week Recovery Timeline After a Mid-Dermal Firming Treatment
Your week-by-week recovery after a mid-dermal firming treatment is predictable and manageable. In week one, expect mild redness, pinpoint swelling, and a tight sensation, which peaks at 48 hours and fades by day five. By week two, the outer skin looks normal, but deeper collagen remodeling accelerates; you may feel firm nodules under the surface—this is a sign of productive fibroblast activity, not a complication. During weeks three and four, the tightening effect becomes visibly noticeable as edema fully resolves and new elastin fibers align. Most clients resume full activity immediately, but avoid intense heat or facial massage for 14 days to protect the treated dermal layer. By week six, the maximum lift is evident, and results stabilize over the following month as your body continues to produce structural proteins. This timeline ensures you can plan social events and skincare routines with confidence.
What’s Normal (Redness, Swelling, Tenderness) vs. What Needs Attention
In the first 48 hours after mid-dermal firming, expect mild redness, localized swelling, and tenderness that peaks by day two, then gradually fades—this is the standard inflammatory response. Normal redness resembles a light sunburn and settles within three days, while swelling feels firm but not hot. Post-treatment redness and swelling warranting attention include sudden increases after day three, throbbing pain, or warmth at the site, which signal infection. Likewise, tenderness that worsens or spreads beyond the treated zone needs evaluation. Blistering, weeping, or intense bruising are never routine. Table: Normal (mild redness <48h, soft swelling, tender to touch) vs. needs attention (spreading redness, tight hot pain escalating past 72h). contact your provider promptly for the latter.< p>
When You Can Resume Retinoids, Acids, and Exfoliating Tools
Your skin’s barrier is rebuilding daily, but **when you can resume retinoids, acids, and exfoliating tools** depends on tolerance, not the calendar. Typically, wait until day 10–14 post-treatment before introducing low-strength lactic acid or a gentle enzyme. Retinoids should hold off until week three, starting with a sandwich method every third night. Physical tools—like sonic brushes or dermarollers—are off-limits for at least four weeks, as friction can trigger inflammation. If stinging or redness appears, pause for 72 hours and drop to once-weekly application. Always patch-test behind your ear first.
Q: Can I use a jade roller during week two to ease tightness?
A: No—any manual exfoliation or massaging tool that creates shear force is unsafe until week four, as it can disrupt immature collagen. Stick to cool compresses and gentle patting motions only.
How Many Sessions Yield a Noticeable Jawline and Cheek Lift—Without Overdoing It
For mid dermal tightening, a noticeable jawline and cheek lift typically emerges after **2 to 3 sessions**, spaced four weeks apart, with the most visible result consolidating by the third. The first session produces mild collagen contraction, visible as a subtle firmness, while the second adds measurable contour along the mandible and malar region. To avoid overdoing it, stop at four sessions; beyond this, fat atrophy or excessive fibrosis can create a hollowed, drawn appearance rather than a natural lift.
The sweet spot is three sessions—maximal definition without the gaunt, over-tightened look.
Optimal outcomes rely on treating within the mid-dermis only, using focal passes on the preauricular and upper cheekbone zones, never over-lapping more than 10% per pass. If no change appears after three, additional energy or depth, not more sessions, is the correct adjustment.
Reading Your Skin’s Response: How to Space Appointments for Natural-Looking Density
Your skin’s recovery timeline is your truest guide for scheduling. After each mid dermal tightening session, watch for lingering redness or slight swelling—if these persist beyond 48 hours, your dermis is still remodeling, so wait another week before booking. Conversely, if the treated area feels completely calm by day three, you can safely compress your interval to three weeks. The goal is to layer collagen stimuli just as the previous wave of inflammation subsides, never stacking on an overwhelmed bed. This rhythm yields natural-looking density—firmness that builds gradually without the overfilled, shiny look. Track micro-texture changes, not just lift; a slight crepey feel means you’re ready for the next pass.
Space appointments based on how quickly your skin calms down, not a fixed calendar—this ensures collagen builds steadily into a soft, natural density without overcorrection.
Combining Mid-Dermal Work With Other Procedures: What Pairs Well and What Sabotages It
Pairing mid-dermal tightening with **radiofrequency microneedling** or targeted Botox for masseter slimming can create a more sculpted jawline, since the tightening firms skin while muscle relaxation reduces width. Hyaluronic acid fillers along the cheekbone also complement the lift, adding volume where the skin now sits tighter. However, sabotaging combinations include aggressive laser resurfacing or deep chemical peels—these inflame the dermis and force your body to prioritize healing over collagen production, dulling results. Likewise, threading or surgical lifts performed simultaneously can distort your natural tension lines, making the mid-dermal effect look patchy. Always stagger these by three weeks for the best outcome.
Choosing the Right Device Setting for Your Specific Skin Thickness and Age
For **mid dermal tightening**, your device settings must align with your skin’s unique thickness and age. Thinner, mature skin demands lower energy and shorter pulse durations to avoid superficial burns while still reaching the mid-dermal layer. Conversely, thicker or younger skin tolerates higher fluence and longer pulses, ensuring heat penetrates deep enough to stimulate collagen contraction without wasting energy on the surface. As skin loses density with age, reduce frequency settings incrementally—your comfort and post-treatment erythema are the best guides. Never default to a universal number; instead, test on a small area and adjust based on immediate tissue response. This personalized calibration is the cornerstone of **choosing the right device setting for your specific skin thickness and age**, directly determining both safety and the durable lifting effect you expect from mid dermal tightening.
Crucial Questions to Ask Your Provider About Energy Depth Before You Commit
Before agreeing to mid dermal tightening, grill your provider on exactly how they calibrate energy depth to your measured skin thickness. Ask: “If my dermis is thinner than average, do you lower the frequency or shorten the pulse?” Demand specifics on how they verify the handpiece’s contact and whether they use real-time impedance feedback to adjust mid-treatment.
Thermal mapping is another non-negotiable—ask to see their target zone on an ultrasound image, not just a generic chart.
Q: “What happens if my collagen density varies across my face—do you change depth per zone?”
A responsible provider should explain per-area adjustments, not a one-size-fits-all depth. Finally, request their protocol for older, thinner skin versus younger, thicker dermis—your age and skin laxity should shift the settings, not just the energy level.
Common Mistakes That Ruin Results and How to Avoid Them in Aftercare
The most common mistake ruining mid dermal tightening results is **skipping consistent hydration**, as the treatment relies on moisture to support new collagen. Avoid this by applying a hyaluronic acid serum twice daily for at least two weeks. Equally damaging is **exposing skin to direct heat**—steam rooms, saunas, or hot water—which flares inflammation and breaks down the targeted fibers. Instead, use lukewarm cleansers and cool compresses. Another frequent error is **aggressive exfoliation**; scrubs or acids strip the dermis right when it’s rebuilding. Switch to a gentle, fragrance-free cleanser. Finally, never skip SPF 50, since UV rays directly counteract the tightening. Protecting the skin barrier is non-negotiable, and any itching or tightness should be managed with bland moisturizers, not harsher products. Your discipline within these first weeks dictates the final firmness.
Why Skipping Sunscreen for Even One Week Can Reverse Collagen Production
After mid dermal tightening, your skin is essentially in rebuild mode, and skipping sunscreen for even one week can reverse collagen production faster than it was created. UV rays don’t just burn—they trigger enzymes that break down the exact collagen fibers your treatment just stimulated. Without daily SPF, new collagen synthesis halts within days, leaving you with laxity instead of lift. Even indirect window light counts. A single unprotected lunch break can wipe out a full week of repair. To protect your investment:
- Apply SPF 30+ every morning, even if you stay indoors
- Reapply every two hours when outdoors
- Wear a wide-brim hat for added physical defense
Miss a week, and you’re essentially pressing undo on your tightening results.
Can You Use Mid-Dermal Tightening on Body Areas? Practical Limits and Realistic Payoffs
Mid-dermal tightening is technically usable on body areas, but its practical limits emerge quickly once you move past the face. On the neck, chest, or inner arms, the thinner dermis responds well, yet on the abdomen or thighs, the thicker subcutaneous fat layer absorbs much of the energy, blunting the contractile stimulus. Mid-dermal tightening relies on precise heat depth, and body contours with lax skin plus fat cannot receive the same focused delivery without risking uneven results or burning. Realistic payoffs mean expecting mild textural improvement—not the dramatic lift you’d see on jowls or brow. For loose belly skin post-pregnancy, you’ll likely need multiple sessions and still see only a fraction of what radiofrequency microneedling offers.
The honest payoff is smoothing, not shrinking: it tightens the dermal web, but it cannot tighten the panniculus beneath it.
Choose it for crepey arms or bra-line texture, not for substantial sagging.
Neck, Jaw, and Under-Eye: Different Zones, Different Depth Requirements
The neck, jawline, and under-eye region each demand a distinct mid-dermal depth because their tissue density and thickness vary drastically. The neck’s platysma is thin and mobile, so a shallower mid-dermal pass (around 1.0–1.5 mm) prevents nerve irritation while still stimulating collagen. The jaw, by contrast, has thicker dermis and subcutaneous fat, allowing a deeper mid-dermal reach (2.0–2.5 mm) to address laxity without risking contour irregularities. The under-eye, with its paper-thin skin and minimal fat padding, requires only superficial mid-dermal energy (0.5–1.0 mm) to avoid ectropion or hollowing. Using a single depth across these zones compromises safety and efficacy. Zone-specific depth selection is non-negotiable for predictable tightening without tissue damage.
| Zone | Typical Depth | Key Constraint |
|---|---|---|
| Under-eye | 0.5–1.0 mm | Thin skin, high laceration risk |
| Neck | 1.0–1.5 mm | Platysma mobility, nerve proximity |
| Jaw | 2.0–2.5 mm | Thicker dermis, fat support |
When Results Are Subtle, Not Dramatic—Managing Expectations Early
For body areas, mid-dermal tightening rewards patience, not drama—so managing expectations early separates satisfied patients from disappointed ones. Unlike facial treatments where skin laxity visibly snaps back, the torso, arms, and thighs respond with millimeter-level shifts that become apparent only after three to six months of collagen remodeling. If you expect a lifted buttock line or flat lower abdomen immediately, you’ll misread the result as failure. Instead, track progress through photographs under identical lighting and by how clothing fits—belts feeling snugger or sleeve openings less gaping. Ask your clinician at the first consult about realistic per-session gains (usually 10–20% improvement in firmness) and plan for maintenance sessions at eight-to-twelve-week intervals. Subtlety is the point: it means the skin wasn’t damaged, just gradually stimulated.